使用 NPM 腳本建立 Hugo 文章
Inori
- 基礎知識:NPM, Hugo, JavaScript, shell script
- 預先安裝 VS Code, NPM CLI, Hugo CLI
使用 Hugo CLI 建立文章對我而言是一項繁瑣的工作。因為我總是使用文章樣板(archetype)建立文章,並將其放置在巢狀階層的資料匣中。例如,在建立本篇文章時,必須在終端機中輸入以下指令:
hugo new --kind develop posts/_developer/create-hugo-post-with-npm-script問題在於,我總是忘記擁有多少種文章樣本,以及資料匣結構目前長什麼樣子。資料匣結構可能是動態的,可能非常頻繁地調整。此外,我非常喜歡 VSCode 在側邊選單「Explorer」中提供的 NPM SCRIPTS 功能,如下所示的截圖:
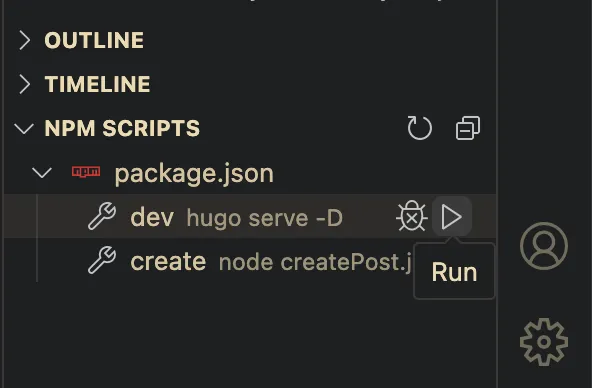
這個功能,我個人稱之為「點擊執行腳本」,若使用者無法記住或忘記腳本怎麼寫,此時就非常方便。但據我所知,它似乎只支援 Node 套件管理,也就是 NPM。為了將「點擊執行腳本」功能與 Hugo CLI 結合使用,需要使用 NPM 作為中間件(middleware),縱然 Hugo 靜態網頁在任何時候都不需要 NPM 或任何 Node 套件。讓我們開始吧。
打造 Hugo Dev 伺服器腳本
Section titled “打造 Hugo Dev 伺服器腳本”首先使用 npm init 初始化 NPM。
然後,在將此腳本添加到您的 package.json 後,讓我們嘗試透過 NPM 啟動 Hugo 本地伺服器:
"scripts": { "dev": "hugo serve -D",}在終端機中,輸入 npm run dev,或者只需在側邊選單點擊 NPM 腳本來執行:
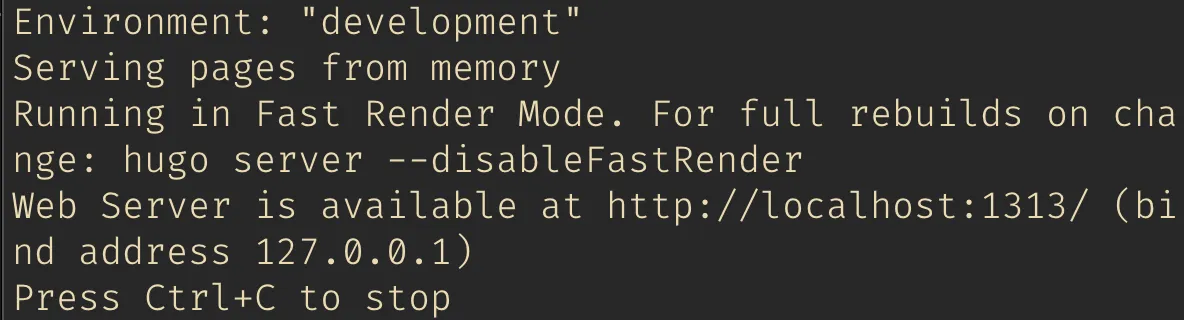
成功執行 Hugo CLI!✨
打造建立文章腳本
Section titled “打造建立文章腳本”因此,NPM 腳本完美地呼叫了 Hugo CLI。然後,讓我們嘗試實現最終目標:建立一篇文章。
首先,我們需要安裝兩個套件:
- @inquirer/prompts:利用 JavaScript 腳本在終端機裡,打造容易操作的介面
- inquirer-directory:在終端機裡也能夠輕鬆操作資料匣路徑
接下來,在根目錄中建立了一個 JavaScript 檔案 createPost.js,以下是程式碼:
"use strict";const inquirer = require("inquirer");const { input, select, Separator, confirm } = require("@inquirer/prompts");const { execSync } = require("child_process");const inquirerDirectory = require("inquirer-directory");
const BASE_PATH = "./content";
inquirer.registerPrompt("directory", inquirerDirectory);
const exec = (commands) => { execSync(commands, { stdio: "inherit", shell: true });};
/** * Create post script * * @see https://github.com/SBoudrias/Inquirer.js * @see https://github.com/nicksrandall/inquirer-directory */(async function () { const archeType = await select({ message: "Select a archetype", choices: [ { name: "Basic", value: "basic", description: "Basic post", }, { name: "Dev", value: "dev", description: "Post for developer.", }, new Separator(), { name: "Garden", value: "garden", description: "Note for digital garden.", }, ], });
const title = await input({ message: "Enter your post title" });
const directory = await inquirer.prompt({ type: "directory", name: "path", message: "Please choose post directory.", basePath: BASE_PATH, });
const answer = await confirm({ message: "Confirm create the post?", default: false });
if (answer) { exec(`hugo new --kind ${archeType} ${directory.path}/${title}`); exec(`open ${BASE_PATH}/${directory.path}/${title}/index.md`); }})();在腳本中,我提供了 3 個問題,以及一些操作:
- 選擇一個文章樣板。
- 輸入文章標題。
- 選擇一個目錄。
- 確認建立。
- 執行 Hugo 文章建立腳本。
- 最後,打開我們建立的文件。
完成精心打造的腳本後,然後將其加入到我們的 package.json 中:
"scripts": { "create": "node createPost.js"}執行 npm run create,以下是執行結果:
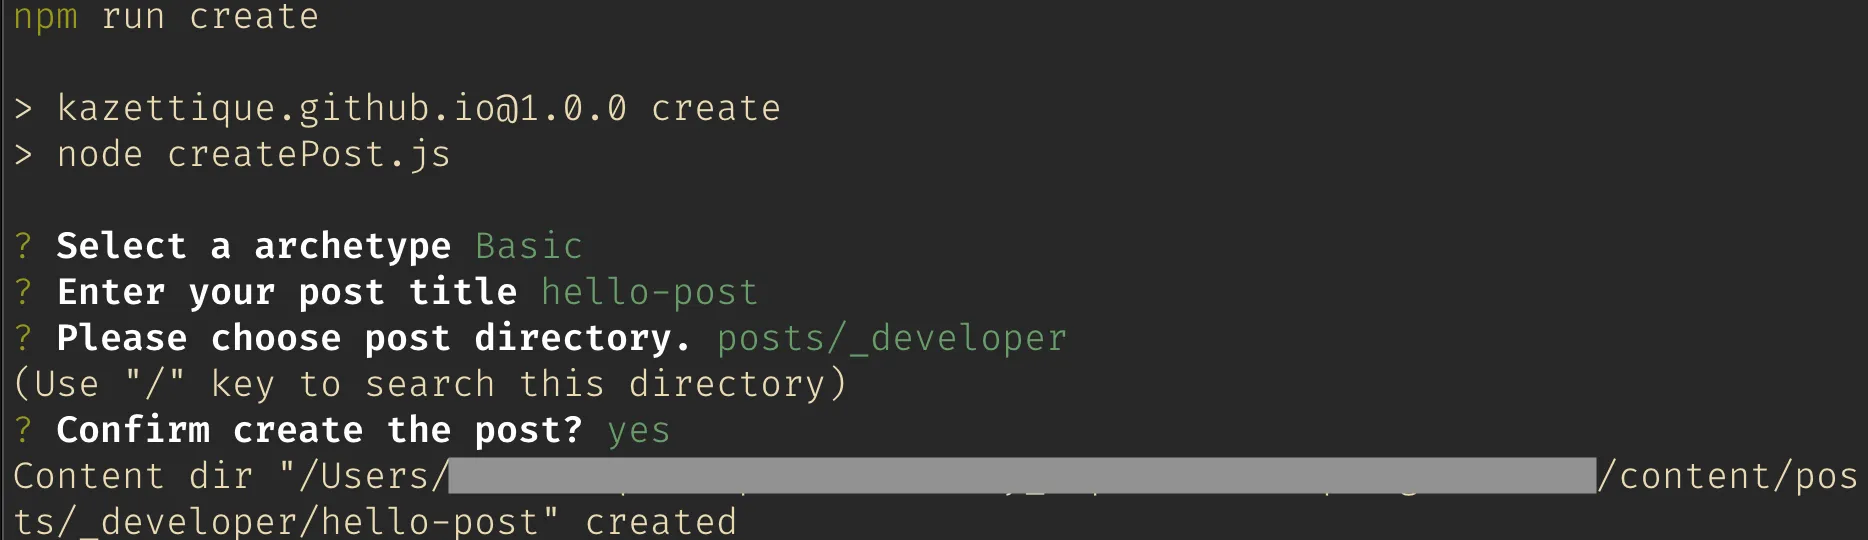
以上,開發愉快。